...
Search for a Payroll Batch Validation
Login to a profile with the appropriate role and/or permission via the DCI website
Select Settings from the main menu
Choose Payroll from the sub menu then Payroll Batch Validation from the fly out menu
Enter the name or status into the search fields then click ‘Search’
The view below will populate with relevant data associated with your search criteria
To reset the search and show all Payroll Batch Validations, click Reset
Export Payroll Batch Validations
Login to a profile with the appropriate role and/or permission via the DCI website
Select Settings from the main menu
Choose Payroll from the sub menu then Payroll Batch Validation from the fly out menu
There are two options to export:
Export all Payroll Batch Validations by clicking the ‘Export’ button located beneath the search filters
Use the search criteria referenced in the instructions above to show a group of filtered Payroll Batch Validations, then click the ‘Export’ button located beneath the search filters
The file will automatically download and save to the ‘Download’ folder on your PC as a CSV file
This file is compatible with Microsoft Excel.
View a Payroll Batch Validation
Login to a profile with the appropriate role and/or permission via the DCI website
Select Settings from the main menu
Choose Payroll from the sub menu then Payroll Batch Validation from the fly out menu
Click anywhere in the row to select a particular Payroll Batch Validation
This will open the Payroll Batch Validation Details screen where you can view/filter events and enable/disable Payroll Batch Validations
Enable/disable Payroll Batch Validations
Login to a profile with the appropriate role and/or permission via the DCI website
Select Settings from the main menu
Choose Payroll from the sub menu then Payroll Batch Validation from the fly out menu
Click anywhere in the row labeled Negative Total Hours
Select Actions then Edit Payroll Batch Validation
Change the status to active or inactive
Click Save then select Yes on the confirmation window
Remove/Reprocess Negative Entries
Select the Payroll tab from the main menu
Select the Batches tab from the sub menu
Locate and open the exception batch
Select the Checkbox above the negative entries and the Select Remove (as displayed below)
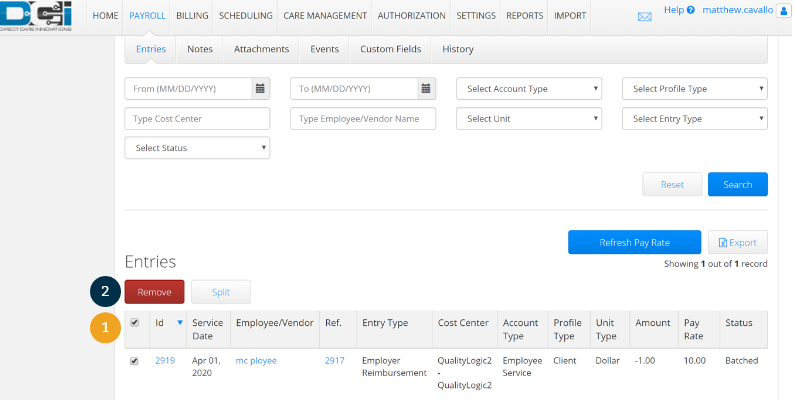
![]()
The exception batch now have zero entries and the status is now changed from pending to canceled.
...