Description: In this guide, the user will learn about the import module in DCI.
Roles Required: Super User
Permissions Required: Import Admin
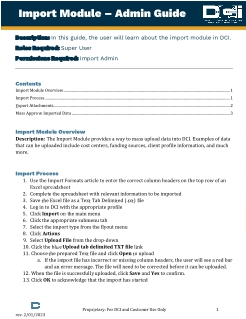
Import Module Overview
The Import Module provides a way to mass upload data into DCI. Examples of data that can be uploaded include cost centers, funding sources, client profile information, and much more.
Import Process
- Use the Import Formats article to enter the correct column headers on the top row of an Excel spreadsheet
- Complete the spreadsheet with relevant information to be imported
- Save the Excel file as a Text Tab Delimited (.txt) file
- Log in to DCI with the appropriate profile
- Click Import on the main menu
- Click the appropriate submenu tab
- Select the import type from the flyout menu
- Click Actions
- Select Upload File from the drop-down
- Click the blue Upload tab delimited TXT file link
- Choose the prepared Text file and click Open to upload
- If the import file has incorrect or missing column headers, the user will see a red bar and an error message. The file will need to be corrected before it can be uploaded.
- When the file is successfully uploaded, click Save and Yes to confirm.
- Click OK to acknowledge that the import has started
- The import process will run in the background. If the Import Completed message template is enabled, the user may receive an email, text message (if mobile was verified), or both stating that the import was complete.
- Click on the Events tab to view basic failure or success results
- Successful import files will have the subject line Import Completed
- Unsuccessful import files will have the subject line Import Failed
- View the results file to see the reason(s) for failure:
- Click on the Attachments tab
- Locate the file name
- Click the download icon
- Open the downloaded .txt file
- Results will be located on the far right-hand side of the file
- Successful import files will state Success
- Unsuccessful import files will state Failure with the reason(s) indicated
- Make necessary corrections and repeat the import process
- To view the results file in Excel instead of text tab delimited:
- Launch Microsoft Excel
- Click Open
- Select Browse
- Select Downloads
- Change file type from All Excel Files to Text Files
- Select the .txt file downloaded earlier and click Open
- In the Text Import Wizard, ensure the file type is set to Delimited then click
- Set the Delimiters to Comma then click Next
- Select Finish on the third page of the wizard
- The last three columns of the Excel document will include:
- ImportStatus – Indicates which rows were imported successfully and/or those that failed
- ItemId – Id number of the item that was created in DCI
- ImportReason – Reason(s) why the row failed
- Make necessary corrections to the Excel file based on the ImportReason field
- Resave the Excel file as a Text Tab Delimited (.txt) file
- Repeat the import process
Export Attachments
- Log in to DCI with the appropriate profile
- Click Import on the main menu
- Click the appropriate submenu tab
- Select the import type from the flyout menu
- Click on the Attachments tab
- Use filters as needed and click the blue Search button
- Export the Entries table to a CSV file by selecting the Export button
Mass Approve Imported Data
- Log in to DCI with the appropriate profile
- Click Import on the main menu
- Click Dashboard on the submenu
- Click Actions
- Select an option from the drop-down menu. Options include:
- Approve Imported Authorization
- Approve Imported Employee Entries
- Run Automated Authorization Download Process
- Approve Imported Authorization Balance Adjustments
- Refresh Billing Rate
- Approve Imported Client Fees (FI Only)
- Approve Imported Vendor Payment Entries (FI Only)
- Approve Imported Accrued Time Adjustment Entries (Instance Level Setting)
- An alert will appear. Click the blue Yes button to continue approving the imported data.
- A green confirmation message will appear stating that the request has been accepted for processing OR there will be no imported records available to mass approve
- If there are no records to approve, verify the data was imported correctly and completely. If corrections need to be made to the import file, make the corrections, reimport, then approve the data again.
Related articles
Related articles appear here based on the labels you select. Click to edit the macro and add or change labels.
