Purpose: This guide provides step-by-step instructions for Providers using the fob device to record their time worked in OR PTC DCI.
Outcome: The Provider has properly recorded their time entries in OR PTC DCI using a fob device. If followed correctly, all time entries will be EVV compliant.
Links:
Fob timesheets (optional):
English, Arabic – عربى, Farsi - فارسی, Khmer (Cambodian) - ខ្មែរ, Korean -한국어, Lao - ພາສາລາວ, Nepali - नेपाली, Romanian – Română, Russian – Русский, Simplified Chinese 简体中文, Somali - Soomaali, Spanish – Español, Traditional Chinese 傳統漢語, Vietnamese - Tiếng Việt
Fob time sheets are also available at your local office.
Steps to complete process:
# | Description | Relevant Screenshot/Link |
|---|---|---|
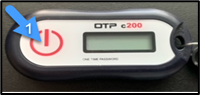
1 | At the start of your shift write down the date and start time and then push the red power button on the fob. |
|
2 | A six (6) digit fob code will display. Write this fob code down on your fob timesheet or wherever you are recording your time. | Troubleshooting:
I pressed the button, but the number disappeared before I could write it down! The fob has a built-in timer. This displays on the left side of the numbers as a set of lines (see picture below). When the red button is pushed, the timer displays and the lines will disappear as time runs out. If you push the red start button and there are only one or two lines, let the timer run out and the display go blank. Push the red start button again and a new code will display with more time for you to write down the code.
I accidentally pressed the button more than once! If you press the button again and a new fob code will display. Previously displayed fob codes will not show again once they disappear. Write down the new fob code that displays. |
3 | Repeat steps One (1) and Two (2) at the end of your shift. | |
4 | Before the pay submission deadline for the two-week pay period, you must enter your shift information into the OR PTC DCI Web Portal to be paid. Open your internet browser on a web connected device, such as a laptop, desktop, or from a web browser on a smart device, such as a tablet or smart phone. Log into the OR PTC DCI web portal: https://orptc.dcisoftware.com/ | |
5 | Click on “Add Entry” |
|
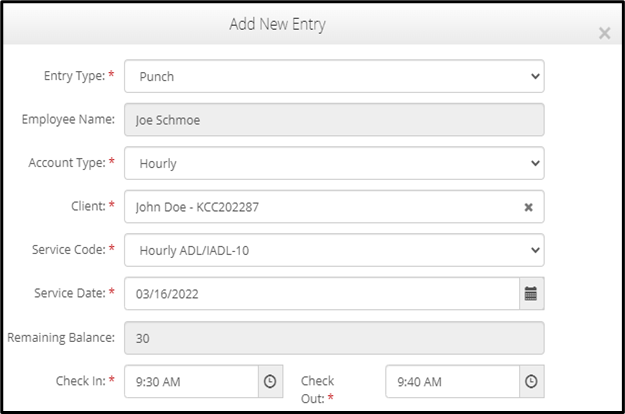
| 6 | The “Add New Entry” form will display. Fill in the form as follows: Entry Type: Auto displays “Punch” Employee Name: Auto fills name Account Type: select Hourly Client: Type in your consumer’s name and click on the name to fill Service Code: Auto fills service code Service Date: Enter date of shift Remaining Balance: Displays remaining authorized hours in the pay period Check In: Enter the start time of your shift Check Out: Enter the end time of your shift |
|
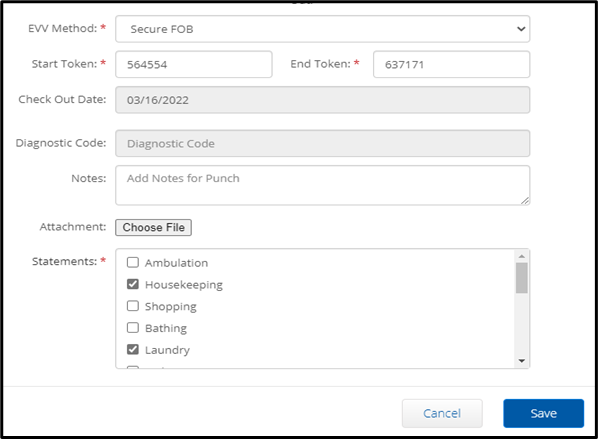
| 7 | EVV Method: Select ‘Secure FOB’ Start Token: Enter the fob code from the start of your shift End Token: Enter the fob code from the end of your shift Check out Date: Auto fills Diagnotic Code: No action needed Notes: Optional Attachment: Optional Statement: Select the tasks you did for your consumer during the shift. You must select at least one. Click ‘Save’ |
|
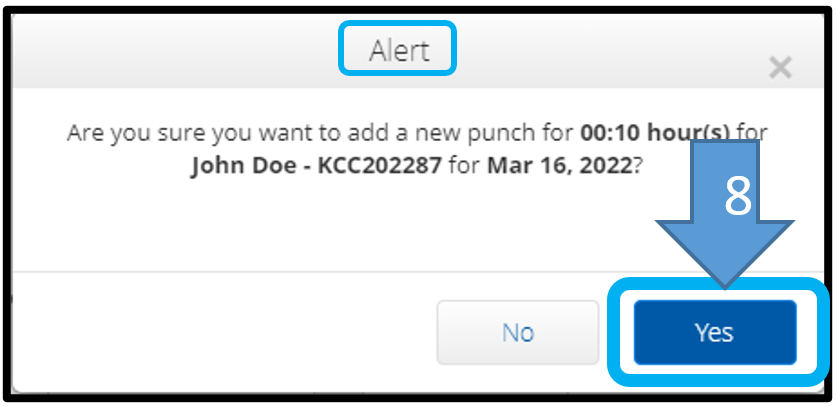
8 | An alert will display “are you sure you want to add a new punch”. Click ‘Yes’. |
|


Related articles