Description: In this topic the user will learn how to make a punch that is EVV compliant on a DCI fob device. The DCI fob is an alternative method of EVV that can be used when the employee does not have a smart phone/device and the client does not have a landline. The fob is a small device that is secured in the home client’s home. Fob EVV is not available for all programs. There is a replacement cost for lost, missing or broken fobs. Speak with your supervisor for details.
Role Required: Employee (base user)
Permission Required: N/A
Use a DCI fob
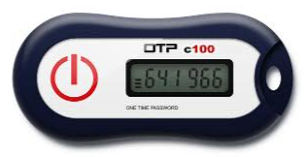
At the beginning of the shift, you will locate the DCI Fob that is in a fixed place in the Client’s home.
Press the red button on the Fob at the start of the shift. Write down the 6-digit token and your start time on the paper timesheet.
Most programs or organizations will provide a timesheet for capturing this information
Press the red button on the Fob at the end of the shift. Write down the 6-digit code and your end time on the paper timesheet.
The paper timesheet is used each day for the same pay period for which services are being provided.
Enter Fob Tokens on the Web Portal
The fob requires that you take the shift information that you recorded on the paper timesheet and enter the information into the DCI web portal. The date of service, start time, start token, end time and end token will need to be entered into the DCI web portal for processing. It is critical that the information written on the timesheet is accurate and legible so that it can be entered correctly.
Login to your personal profile and then Click the blue Add Entry on the Dashboard. The will open the Add New Entry form wizard. The first three fields of the Add New Entry form wizard will be automatically populated for you.
The automated fields will display the following:
Entry Type: Punch
Employee Name: Your Name
Account Type: Hourly
There is no action to take on the fields listed above. Please follow the steps below on how to complete the required fields for completing the Add New Entry form wizard. NOTE: Your program may have different requirements or additional fields to document. Please talk to your supervisor to ensure that there are no additional fields required for your program.
Complete the Add New Entry form wizard
Client: Enter the client name and then select from the list below.
Start entering the letters of the name until the system display names.
Many names look similar, so validate that the correct client is selected.
Service Code: The service code(s) authorized for the client. Select the one that is most appropriate for the service rendered.
Service Date: The date the service took place and was recorded on your paper timesheet.
Check In/Check Out: Here is where to enter the clock in/clock out times from your paper timesheet. Both fields are required. When you click in the field a time dropdown will display in half hour increments.
Time can be entered directly into the field.
Or select the time from the dropdown if the shift started or ended at either the top of an hour or half past the hour.
Click EVV Method dropdown and then click Secure FOB
This will create a new field labeled Start Token and End Token below the EVV Location fields.
The EVV Location fields are optional dropdowns, check with your program to see if they require EVV locations to be selected.
Enter Start Token
Token is the 6 digit code from the fob that was written on your paper timesheet.
Make sure you enter the start token for the date of service being documented.
Incorrect tokens will cause an error when trying to save the punch.
Enter End Token
Token is the 6 digit code from the fob that was written on your paper timesheet.
Make sure you enter the end token for the date of service being documented.
Incorrect tokens will cause an error when trying to save the punch.
Notes & Attachments are optional, please refer to your program's policy on notes and attachments.
Greyed out fields like Employee Name, Check Out Date and Diagnostic Code are not editable, there is no action to be taken here.
Click Save and then Click Yes
Repeat these steps for any additional days that you need to submit. For example, if you are submitting this on Friday for the week, you would have a separate entry for each day Monday through Friday, so you would repeat these steps five times.
Fob Entries - Invalid Tokens
If you enter a time that does not match up with the Fob token, you will get the following Alert when you try to save:
FOB Start and End Tokens are invalid. Do you want to continue with Client Portal Sign Off?
Click No to return to Add New Entry screen
Ensure that the following fields have the correct information from your timesheet:
Service Date
Check In/Check Out:
Start Token
End Token
Click Yes, if you are unable to correct the Fob tokens.
This punch is now a non-EVV compliant.
Please ask your supervisor for policies on non-EVV compliant entries.
For example, a program may require the client or authorized client representative to sign off before this punch can be processed for payment.