Description: In this topic, the user will learn the basics of how to navigate the DCI web portal.
Role Required: Employee (base user)
Permission Required: N/A
DCI Dashboard
Once logged in to the DCI web portal, the user will land on the dashboard. The main menu and submenu, defined below, will be the main points of navigation. Simply click on any of the menu tabs to drill down on the selected profile, module, or setting. To return to the dashboard, click the logo in the upper left-hand corner, or click Home from the main menu and Dashboard from the submenu.
Main Menu
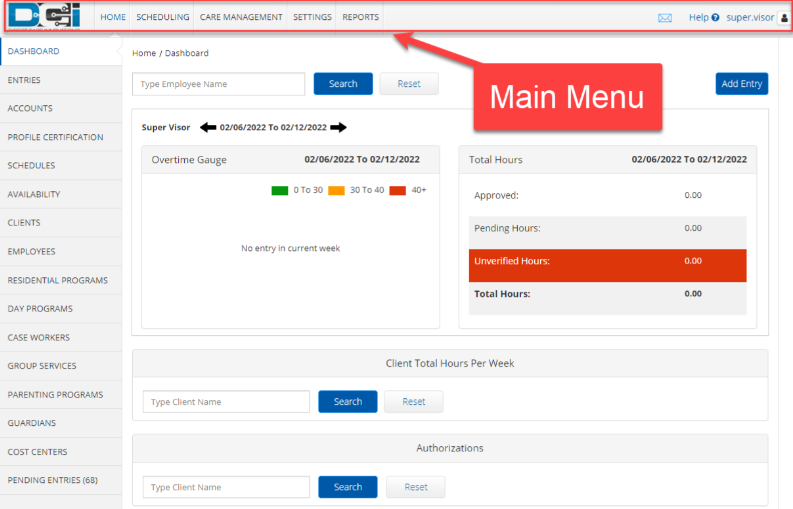
The top portion of the dashboard is called the main menu. Depending on the role, some users may have more tab options on the main menu than others. For example, an employee (base user) may just have the Home tab, whereas a supervisor may have multiple tabs like the image below. The active tab is highlighted in blue font.
All roles will have access to the following tabs on the main menu:
- Company logo: Click to return to the dashboard
- Home: Click to return to the dashboard
- Envelope Icon: Click to access the messaging center
- Help: Click to access help
- Username: Displays the username
- Settings Icon (person icon): Click to update user settings including PIN, password, or email
- Preferred Language: Click drop-down to select preferred language (instance level setting)
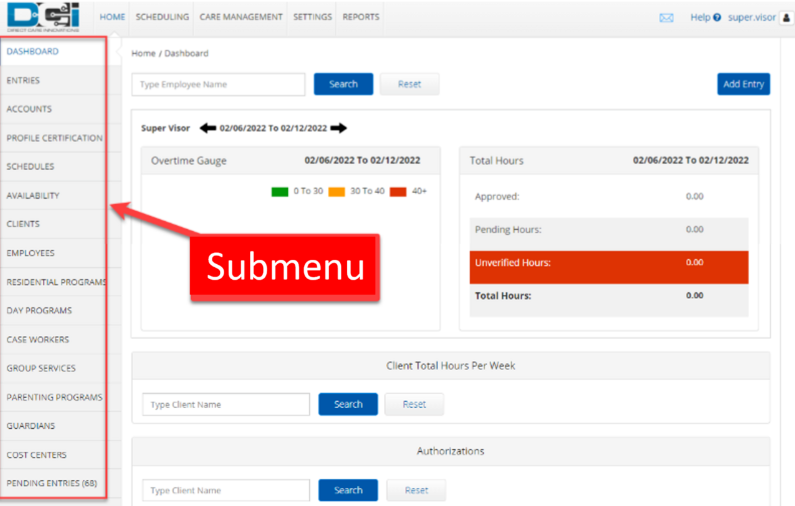
Submenu
The left portion of the dashboard is referred to as the submenu. The tabs on the submenu will change based upon the option selected on the main menu. For example, for users who have access to the Scheduling tab on the main menu, clicking it will display the sub menu for the scheduling module.
All roles will have access to the following submenu items after selecting Home on the main menu:
- Dashboard: Click to return to the dashboard
- Entries: Click to view user punch entries
- Accounts: Click to view user accounts
- Profile Certification: Click to view user profile certifications
- Schedules: Click to view user schedule (scheduling module must be enabled to use)
- Availability: Click to set/view user availability - set days and times available to work (scheduling module must be enabled to use)
Navigating the DCI Dashboard Widgets
The main dashboard has widgets which provide a quick view of employee time, client authorizations, care management, certification information, and online training courses if applicable, as well as news posts. Time entries can also be added here by clicking the blue Add Entry button. Please visit the help center for how to create a punch entry via the web portal.
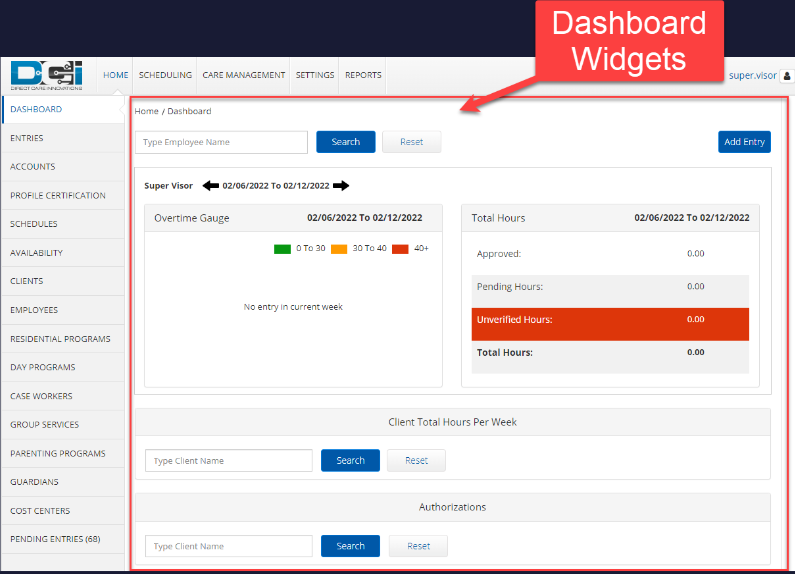
Accessing Total Hours or Overtime Gauge for an Employee
The overtime gauge and total hours widget display the hours worked in a week. The overtime gauge tracks hours using a green, yellow, and red gauge that will display red if the user works over 40 hours. The gauge has no impact on overtime. It simply tracks progress towards 40 hours and beyond. Total hours show the total approved, pending, unverified, and total hours an employee works in a week. The default display is the hours of the user who is logged in to DCI.
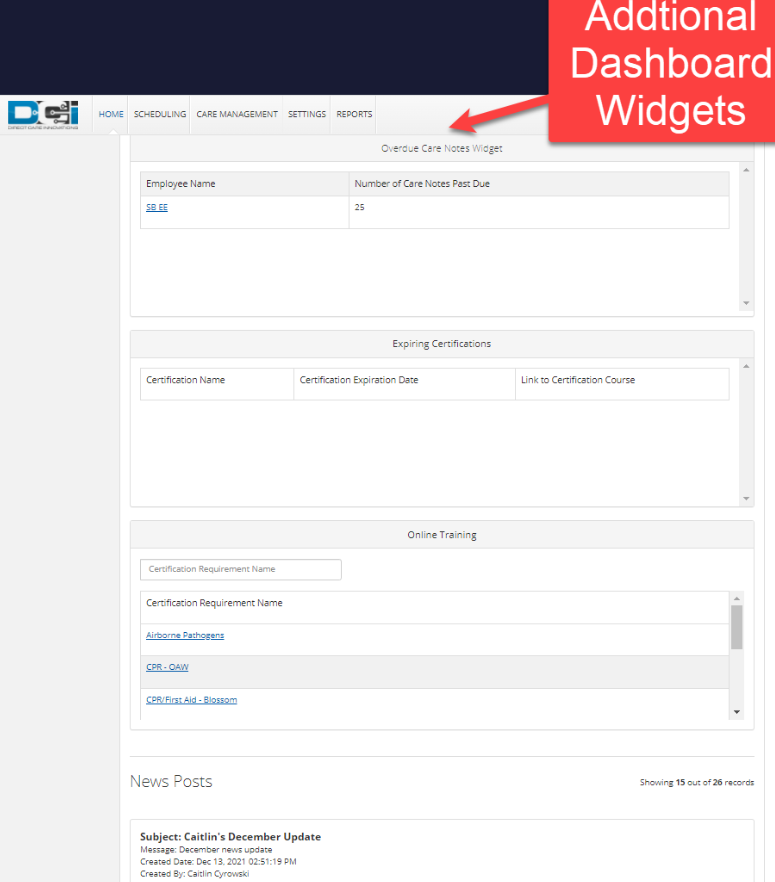
Overdue Care Notes Widget
This widget will display if the Care Management module is enabled, and an employee has an overdue care note. Click on the hyperlinked name to display the details.
Expiring Certifications Widget
The expiring certification widget lets the user know if they have a certification that is expiring. It details the name, expiration date, and link to the course if one is attached.
Online Training Widget
The online training widget displays all courses available to the user. The hyperlink may take users to a video, LMS (learning management system), or outside website.
News Posts
News posts display important information from the program. Scroll down on the dashboard to view the News Post. Click on it to open the details page.
Related articles