The Day Program Schedule Builder allows the supervisor to create a schedule specifically for a chosen Day Program. The Day Program Schedule Builder has two tabs: Clients Schedules and Employees Schedules. All clients and employees with an active service account for that program will be listed on the corresponding tab. The Clients Schedule must be created before creating the Employees Schedule, as the builder takes staffing ratios into account.
Create New Day Program Schedule
- First, create the Client Schedule from the Clients Schedule Tab
- All clients with an active service account for the specified program will be listed in the leftmost column of the schedule table
- The number of weekly hours, hours scheduled, and hours available will appear under each employee name
- If you do not see the client you wish to schedule, verify that they have an active service account
- If you want to use the same schedule as the previous week, click the Copy icon.
- Changes can be made to the schedule by right-clicking on individual entries or creating new entries by following the steps below.
- Click the blank cell on the day you wish to create a shift.
- Verify the date, set the start and end time, add any desired notes and click Schedule
- You cannot schedule a client at the same time that the client is already scheduled somewhere else. To see a client’s full schedule, go back to the Scheduling Module home page and click Clients on the sidebar.
- Click Yes on the confirmation window
- Repeat until the schedule is complete. Copy entries by dragging and dropping to a new cell.
- Click Publish
- Review exceptions and make changes as needed.
- Click Publish on the exceptions window
- The schedule will be visible to clients once it is published.
- Changes can be made to the schedule by right-clicking on individual entries. You must re-publish the schedule for the employee to see the changes.
- Once the Clients Schedule has been published, click the Employees Schedule Tab
- Select the day of the week that you will be scheduled for. This will update the Required Employees Number on the hourly tables.
- All employees with an active service account for the specified program will be listed in the leftmost column of the schedule table
- If you want to use the same schedule as the previous week, click the Copy icon.
- Changes can be made to the schedule by right-clicking on individual entries or creating new entries by following the steps below.
- Click the blank cell on the day you wish to create a shift.
- Verify the date, set the start and end time, add any desired notes and click Schedule
- You cannot schedule an employee at the same time that the employee is already scheduled somewhere else. To see an employee’s full schedule, go back to the Scheduling Module home page and click Employees on the sidebar.
- Click Yes on the confirmation window
- Repeat until the schedule is complete. Copy entries by dragging and dropping to a new cell.
- Click Publish.
- Review exceptions and make changes as needed.
- Click Publish on the exceptions window
- The schedule will be visible to employees once it is published.
- Changes can be made to the schedule by right-clicking on individual entries. You must re-publish the schedule for the employee to see the changes.
- All clients with an active service account for the specified program will be listed in the leftmost column of the schedule table
View Day Program Schedule
- Login to your personal profile
- Click Scheduling on the top bar Click Day Programs on the sidebar
- Select the desired program by clicking anywhere in the results row
- The Day Program Schedule builder has two tabs:
- Clients Schedule
- Lists all clients who have an active service account for the Day Program.
- Clients will be listed once per service code
- Clients Schedule
- There are several numbers listed on each service code. Hover over each number to find out what it represents.
- The first number is consumed weekly hours. This is the total of all pending and approved punches for the service code for the week.
- The second number is scheduled hours. This is the total hours of saved shifts for the week.
- The third and fourth numbers are the maximum available daily hours and weekly hours. These are both set on the authorization. You will receive a warning if you attempt to schedule over the maximum available daily hours.
- Hover over the “I” icon to see more authorization details, including the authorization end date and the remaining balance. You will not be able to create schedule entries beyond the end date or that exceed the remaining balance.
- Employees Schedule
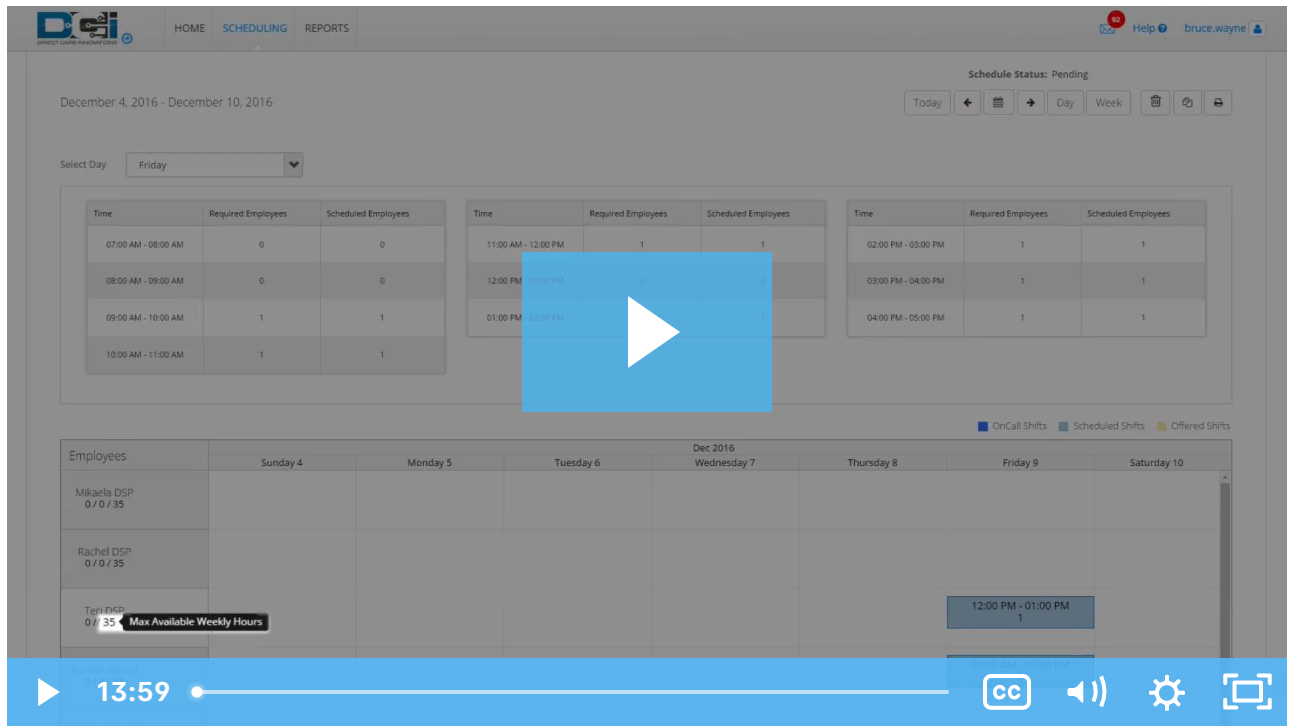
- At the top of the Employee’s schedule is an hourly view of the required employees compared to scheduled employees. Click the dropdown next to Select Day to change the day.
- Required Employees number will be updated when the Client Schedule is published.
- Scheduled Employees updates as new entries are added to the schedule.
- All employees with an active service account for the specified program will be listed in the leftmost column of the schedule table
- The number of weekly hours, hours scheduled, and hours available will appear under each employee name
- If you do not see the employee you wish to schedule, verify that they have an active service account
- The default view is a weekly view. To view an hourly view of one day, click “Day” or click “Today” to go to today’s schedule. To return to the Week view, click Week.
- You can easily navigate to other weeks by using the arrows or the calendar icon.
- There are several tools available to quickly make changes to your schedule.
- Click the trash icon to clear the current schedule.
- Click the copy icon to copy the schedule from the previous week.
- Click the printer icon to print the schedule.
- Right-click on any schedule entry to:
- View Details
- Edit the entry
- Delete the entry
- At the top of the Employee’s schedule is an hourly view of the required employees compared to scheduled employees. Click the dropdown next to Select Day to change the day.
Click the video below to launch the video player in a new tab.
Related articles